9.3 THE PROCEDURE OF BUILDING A TYPICAL SOAP-BASED WEB SERVICE PROJECT
Different methods and languages can be used to develop various Web Services, such as C# Web Services, Java Web Services and Perl Web Services. In this section, we concentrate on developing Java Web Services using the NetBeans IDE. Prior to building a real Web Service project, let’s first take a closer look at the procedure of building a Java Web Service project.
Unlike ASP.NET Web service applications, a Java SOAP-based Web service project is included in a Java Web application project in which the Web service can be deployed based on an appropriate container. Once a Java Web application project has been created with a desired container, you can create a new Java Web service project in the Web application project.
Usually, to build and implement a Java SOAP-based Web service project, you need to follow these steps:
1) Create a new Java Web application project with an appropriate container.
2) Create a new Java SOAP-based Web service project.
3) Add desired operations (methods) to the Web service to build desired functions for the Web service.
4) Deploy and test the Web service in the selected container.
5) Create Web service clients to consume the developed Java Web service.
Next let’s use a simple Web service example, WSTestApp, to illustrate these steps
9.3.1 Create a New Java Web Application Project, WSTestApp
Prior to creating a new Web service project, we need to select our desired container to deploy our Web service. Generally we can either deploy our Web service in a Web container or an EJB con-tainer. This depends on our choice of implementation. If we are creating a Java EE 7 application, we should use a Web container, since we can put EJBs directly in a Web application. However, if we plan to deploy our Web service project to the Tomcat Server, which only has a Web container, we need to create a Web application, not an EJB module.
After a container has been determined, we can create a new Java Web application project with
the selected container. Perform the following operations to create the new Web application project,WSTestApp (refer to Appendix B to download and install NetBeans IDE 12.0):
1) Launch NetBeans IDE 12.0 and choose File > New Project. Then expand the Java with Ant folder, select JavaWeb from the Categories list and select Web Application from the Projects list. Then click on the Next button. You may need to download and activate the Java Web and EE libraries when you open this IDE the first time. Just click on the Download and Activate button and follow the instructions to complete the process.
2) Name the project WSTestApp and click on the Browse button to select a desired location for the project. In this application, we used C:\Class DB Projects\Chapter 9 as our project location. Click on the Next button to continue.
3) In the opened Server and Settings wizard, Click on the Add button on the right of the Server combo box, select the GlassFish Server item from the list as our Web container and click on the Next button to open the Server Location wizard, as shown in Figure 9.3.
4) Keep the default given location to save our GlassFish Server, as shown in Figure 9.3. But you can select another location to save this server if you like.
5) Check the license agreement checkbox, select the GlassFish Server 5.1.0 from the combo box and click on the Download Now button to download GlassFish Server 5.1.0. Your finished Server Location wizard should match the one shown in Figure 9.4. Click on the Next button to continue.
6) In the next wizard, Domain Location, just keep all default settings with no change and click on the Finish button to register our Web Server.
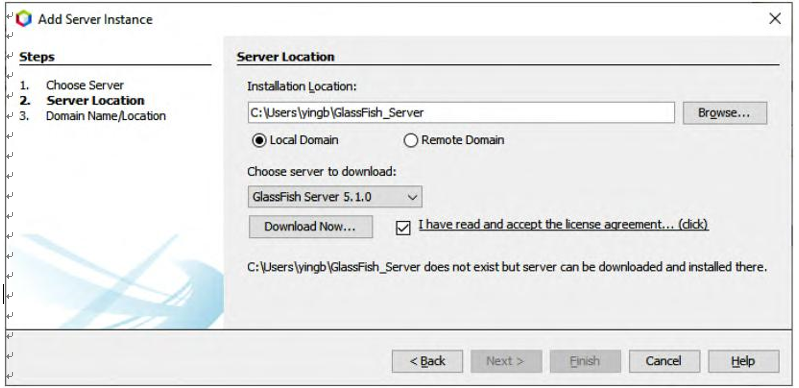
FIGURE 9.3 The opened Server Location wizard.
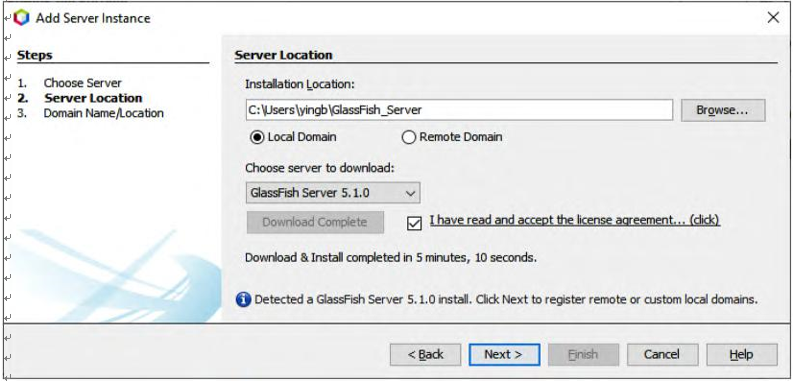
FIGURE 9.4 The finished Server Location wizard.
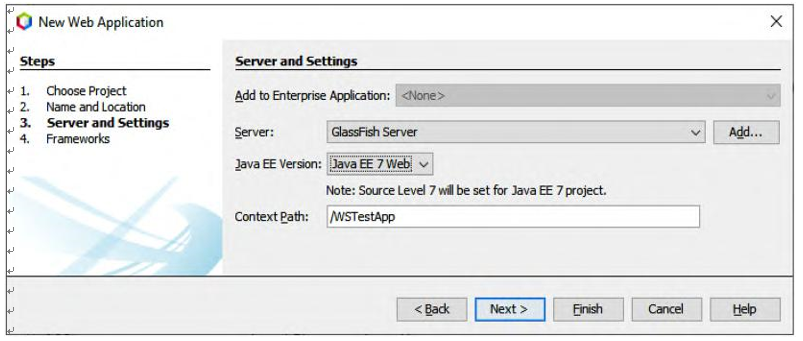
FIGURE 9.5 The opened Server and Settings wizard.
7) In the next wizard, Server and Settings, select the Java EE 7 Web from the Java EE Version combo box, as shown in Figure 9.5, and click on the Next button to continue.
8) In the next wizard, Frameworks, just keep all default settings with no change and click on the Finish button to complete the Web project creation process.
Now that a Web application has been created with a selected Web container, next we can create our new Web service project, WSTest.