9.3.5 Create Web Service Clients to Consume the Web Service
In fact, you can develop any kind of Java application as a project to consume a Web service, such as desktop Java with an Ant project, a Java Web application.
To make this client project simple, we prefer to build a simple Java desktop application project, WSTestClient, to consume the Web service.
Perform the following operations to create our client project:
1) Choose File > New Project to open the New Project wizard. Select Java with Ant from the Categories list and Java Application from the Projects list, and click on the Next button to continue.
2) Name the project WSTestClient and select an appropriate location for this client proj-ect. Leave the Create Main Class checkbox checked and accept all other default settings. Your finished Name and Location wizard should match the one shown in Figure 9.15. Click on the Finish button to create the new project.
3) Right-click on our new client project’s WSTestClient node in the Projects win-dow and choose New > Web Service Client to open the New Web Service Client wizard.
4) Click on the Browse button next to the Project radio button to browse to our Web ser-vice project, WSTest, as shown in Figure 9.16. Click on our Web service, WSTest, and click on the OK button.
5) In the next wizard, New Web Service Client, just click on the Finish button to complete this consuming project creation process.
6) A new node named Web Service References with the following components has been added into our client project, WSTestClient, as shown in Figure 9.17:
a. Our target Web service output file, WSTest
b. Our Web service class file, WSTestService
c. Our Web service port file, WSTestPort
d. Our operation Add() method
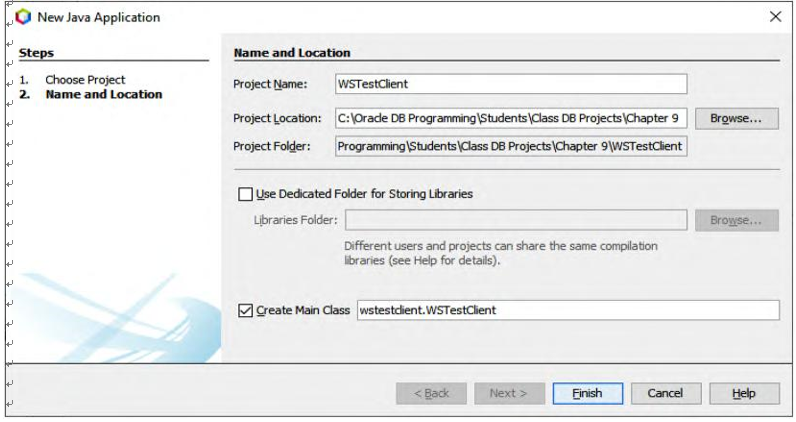
FIGURE 9.15 The finished Name and Location wizard.
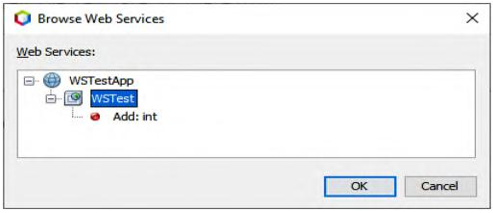
FIGURE 9.16 The Web service browse wizard.
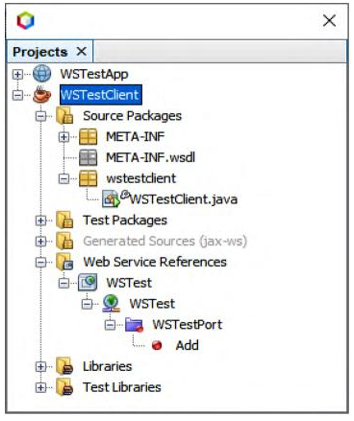
FIGURE 9.17 The new added Web Service References node and components.
Now let’s build the code for this consuming project to consume our Web service. Perform the following operations to build the code for this consuming project:
1) Double-click on our main class file, WSTestClient.java, located at the Source Packages\wstestclient node to open the code window of this file.
2) Enter the code shown in Figure 9.18 into the main() method on this file.
Let’s have a closer look at this piece of code to see how it works.
1) A try-catch block is used to call our Web service to perform a two-integer addition operation.
2) A new Web service instance, service, is created based on our Web service class, WSTestService. The syntax of creating this new service has been changed since NetBeans 8, and the service class must be presented with WSTest _ Service.
3) The getWSTestPort() method is executed to get the current port used by our Web service. This port is returned and assigned to a new port instance, port.
4) Two testing integers are created and initialized as 8 and 7, respectively.
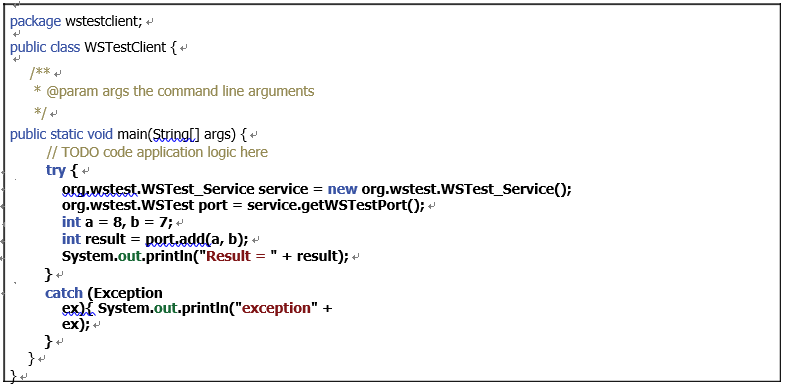
FIGURE 9.18 The code for the main() method.
5) The operation method Add() in our Web service is called to perform the addition opera-tion. The run result of this method is assigned to a local variable named result.
6) The result is displayed in the Output window. Any exception during this Web service calling process will be tracked and displayed by the catch block in step G.
Now let’s build and run our client project to call the Add() method built in our Web service to perform the two-integer addition operation.
Click on the Clean and Build Main Project button to build our client project. Then right-click on our project WSTestClient and select the Run menu item from the popup menu. The run result is shown in Figure 9.19.
It can be seen that calling our Web service is successful, and the addition result of 15 has been returned. Our first Web service project is successful.
At this point, we have learned some fundamental knowledge and have a basic understanding about Java Web services. Now let’s start building some real Java Web services projects to perform database query and manipulation operations against our sample database.