Now let’s take care of the second part of the code for this Java Bean class, which is shown in Figure 8.102.
A. The user-defined method, QueryCourse(), is defined starting from here. The function of this method is to collect the details for each course (course _ id) selected by the user from the CourseList box in our client page and return and display them on our client page Course.jsp. The selected course _ id works as an input argument with this method.
B. The Oracle query statement is generated first to collect all details related to the selected or input course _ id that works as the query criterion.
C. A try-catch block is used to perform the course detail query with a PreparedStatement, and the collected result is assigned to a ResultSet object, rs.
D. A while() loop is used with the rs.next() method as the loop condition to repeatedly collect all course details and assign each of them to the associated property defined in our JavaBean class by using a sequence of getString() methods. A true is returned to the controller CourseProcess.jsp page to indicate the success of running this method.
E. The catch block is used to monitor and detect any possible exception when this query process is executed. A false will be returned if any error is encountered.
F. In steps F to M, a sequence of getter() methods are defined, and they are used to obtain and return each related property defined in this Java Bean class. These getter() meth-ods include collecting all course details and our HashMap object, c _ course.
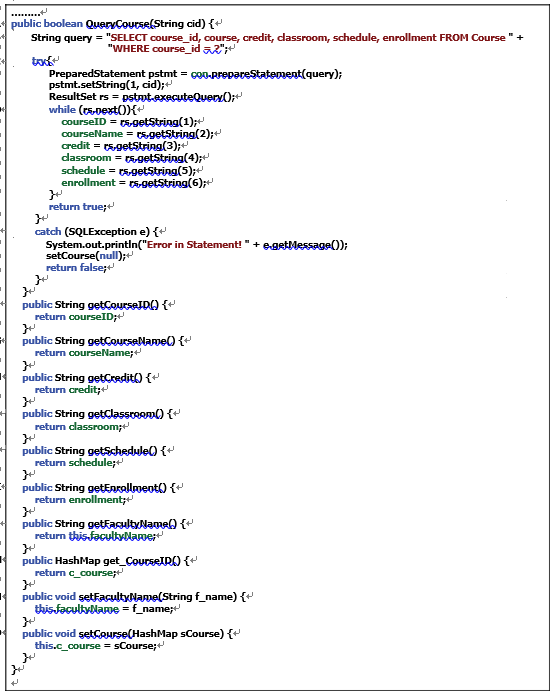
FIGURE 8.102 The second part of the code for the Java Bean class CourseQuery.java.
N. Steps N and O define two setter() methods used to set FacultyName and our HashMap object, c _ course, to the property in this class.
At this point, we have completed all code building and development for our Web application project. Now let’s build and run our project to test the desired functions of the project.
Click on the Clean and Build Main Project button on the top to build the project, and then click on the Run button (green arrow button on the top) to run the project.
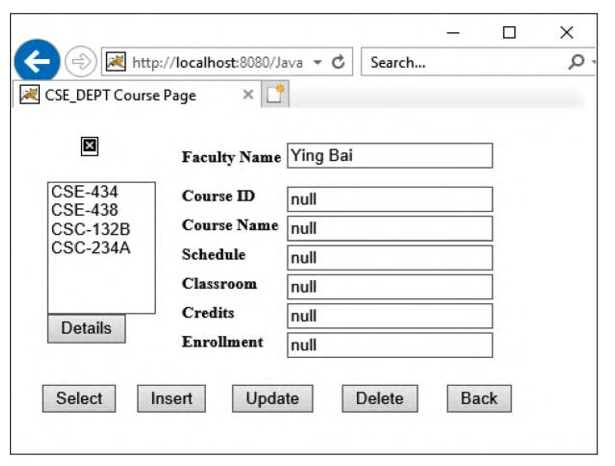
FIGURE 8.103 The run status of the Course.jsp page.
After the project is built and deployed, the LogIn page is displayed. Enter the appropriate user-name and password, such as jhenry and test, to complete the login process. Select the Course Information item from the Selection page and click on the OK button to open the Course.jsp page. Enter a desired faculty name, such as Ying Bai, into the Faculty Name box, and click on the Select button to select all courses (course _ id) taught by this faculty member. All courses (course _ id) taught by this faculty member are collected and displayed in the CourseList box, as shown in Figure 8.103.
Now select a desired course _ id, such as CSC-132B, from the CourseList box by clicking on it, and click on the Details button to get all details about this course. All course details related to the course CSC-132B are collected and displayed in six TextFields on the right, as shown in Figure 8.104.
Our Web application project used to query the Course Table in our sample database is successful. One can try to get course details for any other course to confirm the function of this project. Now click on the Back button to return to the Selection page, and click on the Exit button to terminate our project.
A complete Web application project, JavaWebOracleCourse, can be found in the folder Class DB Projects\Chapter 8 in the Students folder on the CRC Press ftp site (refer to Figure 1.2 in Chapter 1).