9.3.2 Create a New Java SOAP-Based Web Service Project WSTest
The function of this Web service is to add two integers together and return the result. Perform the following operations to create this new Web service project WSTest:
1) In the opened Projects window, right-click on our new created project, WSTestApp, and select the New > Other menu item to open the New File wizard.
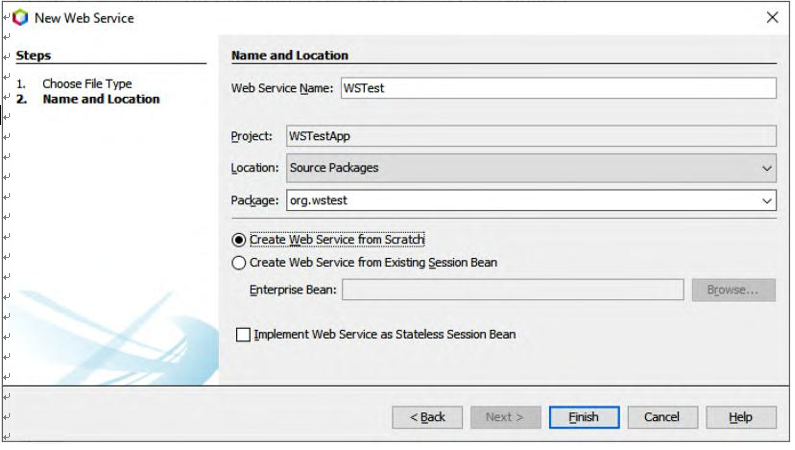
FIGURE 9.6 The finished Name and Location wizard.
2) Select Web Services from the Categories list and Web Service from the File Types list, and click on the Next button.
3) Name the Web service WSTest and type org.wstest into the Package field. Leave
Create Web Service from Scratch selected (Figure 9.6).
Your finished Name and Location wizard should match the one shown in Figure 9.6. Click on the Finish button to complete this process.
The default Java Platform for NetBeans IDE 12.0 is JDK 14, but our current settings are not all compatible with that platform. Thus, we need to change the platform to JDK 8. To do that, right-click on our new project, WSTestApp, and select the Properties item from the popup menu to open the Project Properties wizard for this project.
In the opened Project Properties wizard, click on the Libraries node under the Categories list, click on the drop-down arrow in the Java Platform box and select JDK 1.8 from the box. Your finished Project Properties wizard is shown in Figure 9.7.
If you cannot find the JDK 1.8 platform, click on the Manage Platforms button on the right of the Java Platform box to open the Java Platform Manager wizard. Perform the following steps to add the JDK 1.8 Platform to our project:
1) Click on the Add Platform button located at the lower-left corner to open the Select platform type wizard.
2) Keep the default type, Java Standard Edition, and click on the Next button.
3) Browse to the location where the JDK 1.8 was installed; in our case, C:\Program Files\ Java\jdk1.8.0 _ 271. Click on this item to select it and click on the Next button.
4) In the next wizard, Platform Name, just keep all default settings and click on the Finish button to complete this process. Click on the Close button to close the Manager wizard.
Now click on the drop-down arrow in the Java Platform box, select JDK 1.8 from the box to change the platform and click on the OK button to confirm the change.

FIGURE 9.7 The finished Project Properties wizard.
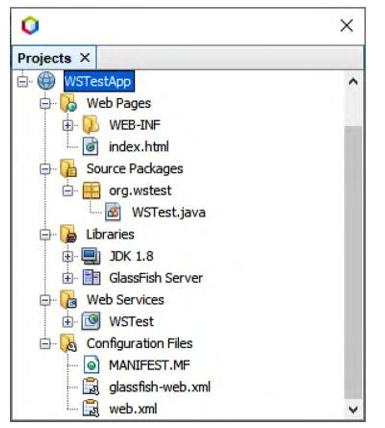
FIGURE 9.8 New added components for our new Web service project.
After a new Web service project, WSTest, is created with the changed platform, the following components are added into our Web application, WSTestApp:
1) A new node named org.wstest with a new Java class, WSTest.java, has been added to the Source Packages node in our application. The Java class file WSTest.java is the main body of this Web service, and all functions of this Web service should be per-formed by adding operations or methods into this class.
2) A new node named Web Services with a new icon, WSTest, has been added into our Web application. This WSTest icon is our target Web service output file that can be tested later when it is built.
3) A new file named web.xml has been added into the Configuration Files node in our project. This file is called the Web deployment descriptor file, and it is used to define how to deploy our Web service on a server.
4) Some Metro Web service libraries have also been added into the Libraries node in our project to provide support to our Web service development.
5) All of these new added components are shown in Figure 9.8.
Now we can add new operations or methods into our main body class, WSTest.java, to build our Web service to perform the desired function. In this simple project, we just want to perform an addition function to add two integers entered by the user via a client.